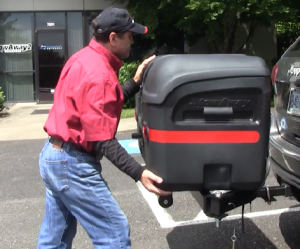
You’ve got the strength, and we’ve got the steps how!
With a long list of things to do before leaving on a trip, your friends and family are scattered in different directions trying to get everything done in time. Before you pack anything, you need to install your StowAway. You look left, you look right, and no one is around.
How are you going to install the StowAway by yourself? Luckily, you aren’t alone – well, you know what we mean! Other customers have had the same question, which is why StowAway wants to share the steps to complete an installation by yourself.
 Note: Upper body strength is a must for lifting the StowAway and sliding it into the hitch receiver. If you have back problems, it is best to wait for assistance.
To install, you’ll need:
- ¾” socket wrench
- Hitch tightener
- Hitch lock and pin
- Good upper body strength
Step 1 – Align the StowAway hitch frame with your vehicle’s hitch and slide it into place. If it is not aligned, the hitch pin will not go in.
Step 2 – Insert the hitch pin and lock.
Step 3 – Next, slide the hitch tightener into place and use the ¾” socket wrench to tighten the nuts evenly.
Step 4 – Plug in cord for taillights.
Step 5 – Lock the StowAway in place and tighten the T-bolt. If you have a Swing Away hitch frame, don’t forget to insert the frame pin to keep the StowAway in place.
Helpful tip: Install the wheel kit to make moving your StowAway from garage to vehicle as easy and effortless as possible. They attach to the existing frame and won’t get in the way. Therefore, you can leave them on permanently, so they are there when you need them.
While installing and removing the StowAway is much easier with two people, it is helpful to know how to do it by yourself. Schwarzenegger strength is not required, but please be careful and watch the How to Install by Yourself Video in advance!